Hello again!
First things first – we now have a Sponsors page! We just finalized our first sponsorship agreement with HydroAir (a New England fluid power reseller and engineering company) and HydraForce (a leading manufacturer of cartridge valves and hydraulic controls systems); between the two companies, they will be providing us 21 proportional valves for the robot.
We’re ecstatic to announce that after working full-bore this past week, and after a couple of minor irritating hiccups, we managed to finish the Leg Cart mechanical and hydraulic assembly and turn it on for its first couple of tests. We made a compilation video of all the tests we ran on the 15th – check it out:
You’ll notice some jerkiness in the initial motions of the leg – we believe this is equally due to (a) air in the lines and (b) jury-rigged control of the proportional valves.
We assembled all of the hydraulic components in place, and filled them with hydraulic oil as best we could. Unfortunately, since the reservoir level is below our valves and some of our pistons, air is easily trapped in place. The compression and expansion of this air contributes significantly to making the leg so springy. Tomorrow night, we’ll be “bleeding” the robot (a rather scary name for removing air from hydraulic lines) – we’ll be detaching all of the components, bringing them under the fluid level of the reservoir, and even assembling some of the components in a bath of hydraulic oil to make sure no air gets in. The big lesson learned for the real robot assembly is to place the reservoir higher up, the valves and pistons lower down, and make absolutely sure to fill the system in a way that removes as much air as possible beforehand.
Our control of the proportional valves for the test amounted to a box of switches attached to each of the valves, powered off of a current-controlled power supply. The more current you push into the valves, the more hydraulic flow the valves allow – you can check out the HydraForce valves we’re using here. We had no idea what current settings would work for the robot, which is why you see the robot start moving really quickly at the start of the film and then move in a much more controlled fashion later on.
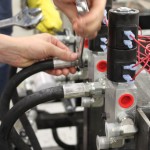
Check out our gallery of hydraulic assembly pictures below for more details on how we built this thing!
That’s all for now. We’ll get some more videos once the electrical and controls team wrestles the mechanical system into something that’s much more behaved!
-Gui


Anything new with this project? I check here every day. I’m excited to see how it turns out!
Yep, we just posted an update you can check out here: http://projecthexapod.com/blog/systems-integration-hell/ Thanks for checking in! It’s been a couple of weeks of us trying to figure out what the heck is going wrong.